Need to make some changes to your store structure? Or add some delivery options? Or maybe cancel the order? Here, we collected several common user cases of online store management and quick solutions to them. Check them out and enable these great features in your online store for more efficiency.
How to Create Category in Magento 1
A Category is needed to establish the structure of your store’s Catalog. Before creating categories you need to think about the usability of your product page, so the user can browse product from one category and easily navigate to different subsections. Try to be consistent and use the same approach for all product types in your catalog.
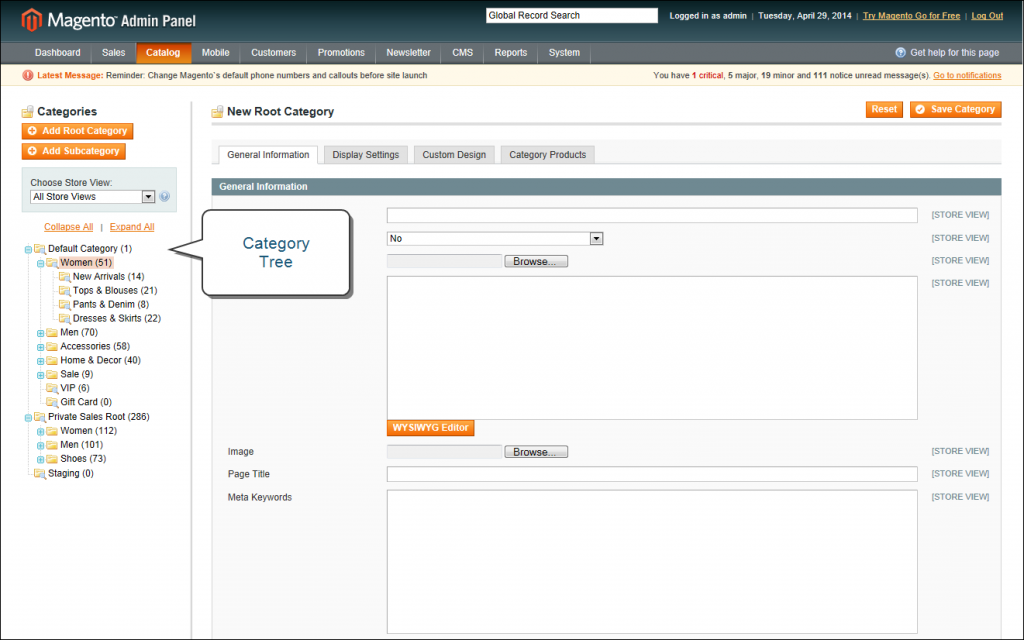
To create categories, use the admin panel. Below, we will show how to create and add categories, and answer other questions related to working with categories.
Step 1. On the Admin menu, select Catalog > Manage Categories.
Step 2. Before you begin, set Choose Store View to the store or view. By default, the scope of the category configuration is set to “All Store Views.”
Step 3. In the category tree, click the category that is to be the parent of the new category. The parent is the level just above the new category.
If you’re starting from the beginning without any data, there might be only two categories in the list: “Default Category,” which is the root, and an “Example Category.”
Step 4. Click the Add Subcategory button.

After creating the category, you need to add them to create the catalog structure. Learn how to do it from the below guide.
How to Add Category in Magento 2
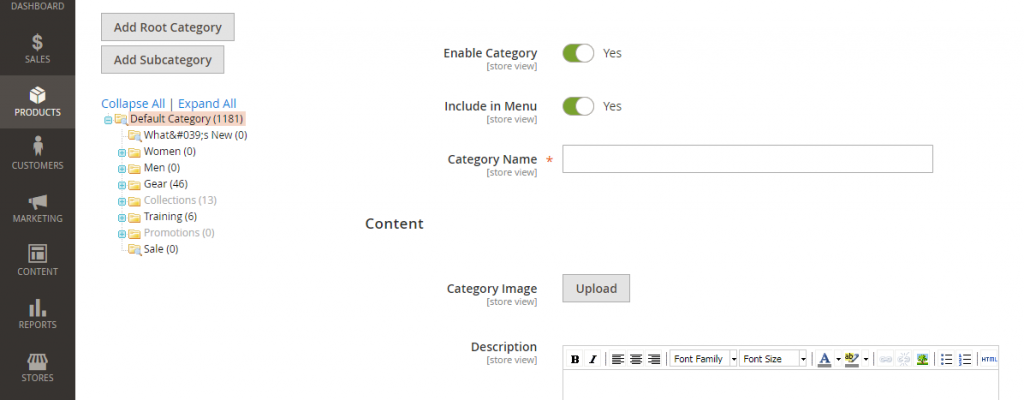
Step 1. Login in Magento Admin.
Step 2. Select Products -> Categories.

Step 3. Select Parent or Root Category in which you need to insert your new category and click “Add Subcategory” or you can create Root Category.

Step 4. Enter Category data. Category Name is required entry. Click the Save button.

How to Cancel Magento 2 Order
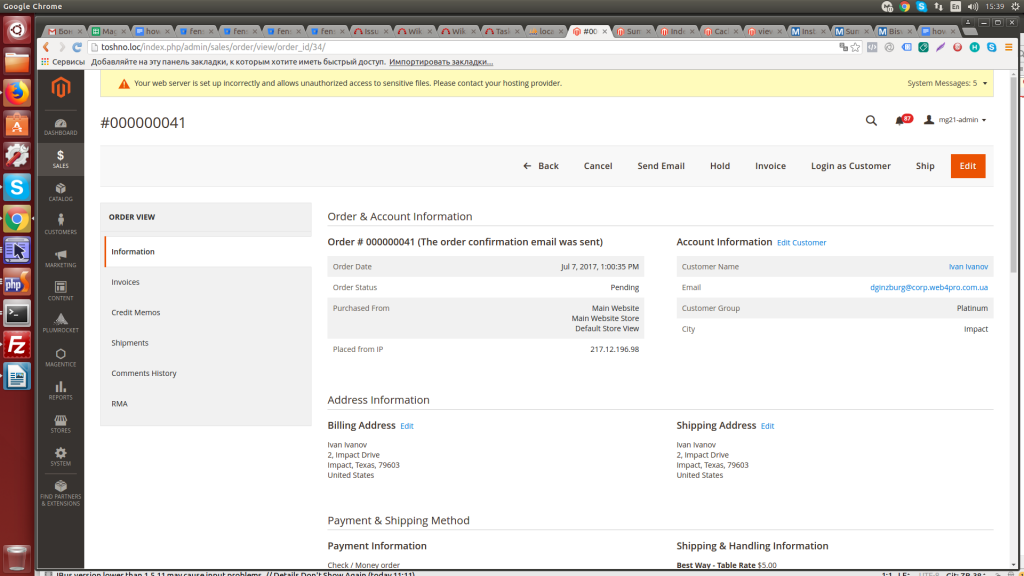
Magento 2 order can be canceled by using Cancel Button on order view page in admin. It’s possible only, if order hasn’t yet been fully paid, so there is no invoice, that covers all order. If some items have been marked as invoiced, then it’s possible only cancel item, that hasn’t been paid yet.

How to Add Cash on Delivery Option in Magento 2
Cash on Delivery payment may be enabled on Stores -> Configuration -> Sales -> Payment Methods -> Cash on Delivery by setting Enabled option to value Yes
Finally, if you make any changes to your store, you should reindex Magento to make them apply and be displayed correctly. For example, reindexing is necessary in scenarios like introducing a new store or website, incorporating new attributes, or making substantial changes to merchant data.
Magento 2 encompasses a substantial amount of merchant data that needs to be accessed, searched, and utilized, such as catalogues, prices, stores, and other elements. These data items are distributed across multiple tables to enhance performance.
How to Reindex Magento 2
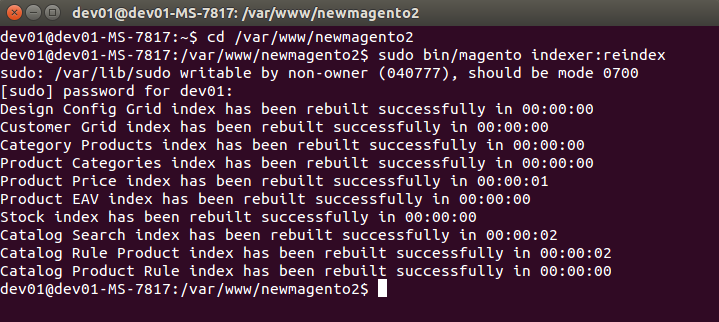
For reindex magento 2 you need run the command: sudo bin/magento indexer:reindex

Page 1- normal result from reindex
These were just a few common cases, and we hope solutions to them will help you manage your store quickly and effectively. If you have any questions, want to learn solutions to other cases, or need help with your store, drop us a line, and we will be glad to consider your case.