How to Operate Your Store With Magento Store Manager Effectively?
Every business owner knows that having a successful business is achieved by having a company that is managed properly. That’s why you might be thinking of using the Magento® Store Manager to help you with your daily needs. Below, you can learn more about Magento 2 Store Manager; for example, what it is, the benefits of the tool, and more!
What is Magento Store Manager?
Store Manager for Magento 2 is a tool that allows you to keep track of your inventory, your customers, your orders, and other necessary tasks.
One of the best features of the Magento Store Manager Extension is that you can work offline to edit your inventory. With it, you can experience better functionality.
Overview of the Features
If you want to know how you can manage your store with this addon, you need to know about which features you have at your disposal.
Product and Category Management
Magento Store Manager allows you to organize your inventory. You can also create different categories to ensure that you never lose track of the products you have.
Beyond this, you’ll also be able to import all information regarding your inventory to make sure that you always control all the stocks at your store.
Order Management
When you use Magento Store Manager, you can work with an unlimited number of customers and orders. Among many features, you’ll experience the following:
- You can edit products that were ordered.
- You can send invoices.
- You’ll always have real-time data regarding imports and exports.
- You can sync your eCommerce store with both eBay and Amazon
Customers’ Management
This allows you to manage as many clients or customers as you need. You’ll also be able to collect data on your various customers so that you can analyze this information for your marketing purposes.
Advanced Management
You can take advantage of its management features and advanced reporting. With the last one, you can prepare charts on your mobile device. In this way, you can manage your business when you’re on the, go, and you can always be up-to-date with your reports. You will have access to your sales and view them in the formats by country or in multiple languages. Advanced features will allow you to manage complicated tasks.
Useful for you:
Inventory Management
You can keep track of your inventory at all times and have it synced so that you always have a real-time version of your stocks. This is beneficial for people who have a large number of orders or who change inventory often.
Technical Details
While the many benefits of Magento Store Manager are appealing, you’ll also need to know about the tool’s technical details. To operate the store, use these browsers: Chrome, Firefox, Safari, Opera, Edge, and IE.
Which Problems Will Store Manager Solve?
In order to know whether you should be using this tool, you should also know which problems you’ll be able to solve by using it. You might also find it useful to use Store Manager for Magento reviews.


Speed Up the Performance and Order Fulfillment
Because of Magento Store Manager’s high efficiency, your store’s online performance will be improved. As your inventory and orders are synced in real-time, the entire process occurs more quickly.
Regulated Workflow
Because you won’t have to spend as much time organizing your inventory, orders, and customers, you’ll be able to work more efficiently in general. Your workflow will be regulated because you can focus on other aspects of your business.
Advanced Analytics and Reporting
There are a number of benefits to using advanced analytics and reporting. Among them, you can understand your customers or visitors better and you can tailor your content to accommodate their needs. In this way, you can attract more people to your website, and increase the chance of them buying more products.
Store Diagnostics
Store diagnostics are some of the best ways for you to gain an understanding of your business. Depending on your edition, you can have between one and eleven different reports. From best sellers to latency matrix, you’ll have an idea of which products are best. This will provide you with an idea of which products you should put up for sale or which you should take off the market completely.
How Much Does Store Manager for Magento Cost?
If you’ve gotten this far, you probably want to know the total cost of using Store Manager.
- The Standard package costs $249. You can have a total of one seat with this package, along with one connection. It’s compatible with Magento Open Source and Magento Commerce. You’ll have a number of support questions and you’ll be able to buy a separate training session to ensure you know how to run this feature. With the standard package, you’ll be slightly limited in what you can do; for example, you won’t be able to import orders or provide gift cards.
- The Professional edition will cost $499 and will provide all of the features we presented before. You’ll also have access to a number of other features. You’ll have an extra seat and an unlimited number of stores/connections. While you still won’t have gift cards, you’ll be able to import orders and limited tier price multi-editor.
- At $1499, you can have an Enterprise edition. This will provide you with every feature you could want for your store. You’ll have a free, 2-hour training session, 2 hours of technical remote desktop assistance, access to gift cards, and more! One of the most desired features of the enterprise edition is their store diagnostics. You can have access to 11 different reports. This will provide you with information like frequency, best sellers, order total, best viewed, etc.
Useful for you:
Top Solutions To Store Manager For Magento
Now that you know more about Magento services, you might be wondering what the best Magento Store Manager alternative is.
Store Manager Connector by eMagicOne

With this extension, you have the opportunity to connect your Store Manager with Magento 2. As such, you’ll always have an idea of what your inventory is and you’ll be able to see your business’s data in real-time.
Package and Versions: Community; 2.0, 2.1, 2.0.
Price: Free to use.
Omnichannel Solution by Magestore

Having a single interface to run your entire store is essential. This way, you can see all of your store’s data on a single screen, and you don’t need to worry about having anything updated because your updates are performed in real-time. As such, you always know what’s happening in your Magento eCommerce store.
Package and Versions: By request; including the latest 2.3 version.
Price: $299 for the basic solution. Other 2 packages’ price information is available upon request.
How to Work with Magento Extensions/ Magento 2 Database
Magento extensions are the combination of functions that can be added to any Magento store to enhance its functionality. If you are looking for the general setup and the initial steps on how to create Magento extension – this section is formed for your help. Also, we’ve covered the question of how to work with databases and set up the cron job.
Below you can find frequently asked questions and solutions for each of them.
What is Magento 2 Marketplace?
Magento Marketplace, the official Magento extension store, is the global eCommerce resource for applications and services that expand Magento solutions with powerful new features and functionality. Now global retailers can do even more with their digital stores.
This source is designed for easy discovery of relevant Magento extensions. It provides a curated user experience with offerings from top brands and new innovators. Discover new and customized functionality, in key business categories, to help your business thrive.
Customers can trust that all extensions and providers with offerings in Magento Marketplace are reviewed and checked for quality. In addition, Magento Technology Partners participate in a manual code and documentation review…for an even higher level of quality assurance.
So, how to install, create and uninstall any extension from your Magento store, you can find below.
How to Install Extension for Magento 2 in Localhost?
Step 1: Download/Purchase the extension.
Step 2: Unzip the file in a temporary directory.
For example, on Linux you can use next command:
unzip exten_file.zip -d somedir
Step 3: Upload it to your Magento installation root directory.
Step 4: Disable the cache.
Go to System >> Cache Management or use the command:
sudo bin/magento cache:flush
Step 5: Run the command.
Enter the following at the command line:
sudo bin/magento setup:upgrade
Step 6: Find your extension installed.
After opening Stores >>Configuration >>Advanced >> Admin, the module will be shown in the admin panel or, you can find your extension on list modules that are displayed in command line after step 5.
How to Create Custom Extension in Magento?
Step 1. Disable Magento cache (recommended).
Disabling Magento cache during development will save you some time because you won’t need to manually flush the cache every time you make changes to your code.
The easiest way to disable cache is to go to Admin >> System >> Cache Management >> select all cache types and disable them.
Step 2. Put Magento into a developer mode (recommended).
You should put Magento into a developer mode to ensure that you see all the errors Magento is throwing at you.
In order to do this, open your terminal and go to the Magento 2 root. From there you should run the following command:
php bin/magento deploy:mode:set developer
Step 3. Create the folder of Hello World module.
Name of the module is defined as “VendorName_ModuleName”. The first part is the name of the vendor and the last part is the name of the module: For example Magento_HelloWorld.
Focus on the following guide to create the folders:
app/code/NS/Firstmodule
Step 4. Create etc/module.xml file.
Then, it is necessary to create an etc folder and add the module.xml file:
app/code/NS/Firstmodule/etc/module.xml
Contents would be:
<?xml version="1.0"?>
<config xmlns:xsi="http://www.w3.org/2001/XMLSchema-instance" xsi:noNamespaceSchemaLocation="urn:magento:framework:Module/etc/module.xsd">
<module name="NS_Firstmodule" setup_version="0.0.1"/>
</config>
Step 5. Create etc/registration.php file
In this step, we will add registration.php as the following guide:
app/code/NS/Firstmodule/registration.php
Contents would be:
<?php
\Magento\Framework\Component\ComponentRegistrar::register(
       \Magento\Framework\Component\ComponentRegistrar::MODULE,
       'NS_Firstmodule',
       __DIR__
   );
Step 6. Enable the module.
Finish the step 5, we have already created Firstmodule. And we will enable this module in this step.
After creating the module run the next commands:
php bin/magento setup:upgrade
If all is good, you will see your module in the list, for example:

php bin/magento setup:static-content:deploy
Step 7. Creating a controller.
7.1. First, we need to define the router.
To do this, create a routes.xml file in the
app/code/NS/Firstmodule/etc/frontend/
folder with the following code:
<?xml version="1.0"?>
<config xmlns:xsi="http://www.w3.org/2001/XMLSchema-instance" xsi:noNamespaceSchemaLocation="urn:magento:framework:App/etc/routes.xsd">
   <router id="standard">
       <route id="firstmodule" frontName="firstmodule">
           <module name="NS_Firstmodule" />
       </route>
   </router>
</config>
After defining the first part of the route, the URL will be displayed as:
http://<yourhost.com>/firstmodule/*
7.2. Create a controller
The folder and file you need to create are:
app/code/NS/Firstmodule/Controller/Index/HelloWorld.php
Contents would be:
<?php
namespace NS\Firstmodule\Controller\Index;
class HelloWorld extends \Magento\Framework\App\Action\Action{
   public function execute()
   {
       echo "Hello! It’s my first module of Magento 2!";
       exit;
   }
After completed, please run sudo bin/magento cache:flush
to check result.
Your URL now should be as:
http://<yourhost.com>/firstmodule/index/helloWorld
After finish all steps, the output Hello! It’s my first module of Magento 2! should be displayed in your browser when you open the URL.

How to Uninstall Magento 2 Extension?
If the extension is installed via composer, then you can uninstall Magento 2 extension this way:
Step 1. Remove extension from the composer.json file
Step 2. Execute command composer update
Step 3. Execute command bin/magento setup:upgrade
Step 4. Execute command bin/magento setup:di:compile
Step 5. Execute command bin/magento setup:static-content:deploy
If the extension is installed to app/code directly, it will be uninstalled this way:
Step 6. Remove extension from app/code. It’s enough to remove extension registration.php file
Step 7. Execute command bin/magento setup:upgrade
Step 8. Execute command bin/magento setup:di:compile
Step 9. Execute command bin/magento setup:static-content:deploy
Next, we move on to work with a database and set up the cron job.
How to Find Database Name in Magento 2
Go to your store core folder and open the env.php file under the app/etc folder.
Find the next code, where database_name is the actual database name which you use for your Magento 2 store.
array (
 'host' => 'host_name,
 'dbname' => 'database_name',
 'username' => 'your username',
 'password' => 'your password',
),
How to Change Database Name in Magento?
In Magento 1.0, the configuration file that contains database settings and other information is located here:/app/etc/local.xml
In Magento 2.0, the configuration is in the same directory (/app/etc/) but has been renamed to env.php. The file path is: /<Magento Install Dir>/app/etc/env.php
Navigate to your Magento 2 installation directory and edit app/etc/env.php configuration file in your favorite editor
For example :
'db' =>
array (
 'table_prefix' => '',
 'connection' =>
 array (
   'default' =>
   array (
     'host' => 'localhost',
     'dbname' => 'Magento2',
     'username' => 'root',
     'password' => 'root',
     'active' => '1',
   ),
 ),
),
Where:
host – is your MySQL server hostname
dbname – MySQL database name of Magento
username – MySQL user to connect database server
password – MySQL user password
After changes in this file you need to run the command: sudo bin/magento setup:di:compile
That’s how you change Magento database name.
How to Setup Cron Job in Magento 2?
Magento 2 Cron job may be set up by module file etc/crontab.xml, that will have such content.
<?xml version="1.0"?>
<config xmlns:xsi="http://www.w3.org/2001/XMLSchema-instance" xsi:noNamespaceSchemaLocation="urn:magento:module:Magento_Cron:etc/crontab.xsd">
   <group id="default">
       <job name="download_expire_link" instance="Web4pro\Download\Model\Cron" method="execute">
           <schedule>0 1 * * *</schedule>
       </job>
   </group>
</config>
Class Web4pro\Download\Model\Cron should exist and implement method execute, that will run when cron job starts.
The Overview of the eCommerce in Sweden: Stats and Trends
Online shopping is on the rise internationally, and this trend shows no signs of slowing. It’s picking up more speed and generating larger revenues each year.
Sweden is a business-friendly, modern country, and currently has one of the most successful and stable economies in Europe. Though not at the top of these trends, eCommerce in Sweden has increased significantly over the last decade.
With this in mind, we’ll look at some of the key trends for online shopping in Sweden. We’ll explore the behavior and preferences of Swedish shoppers, as well as some of the most important features needed to make your Swedish online store successful.
In addition to market trends and hot product categories, we’ll have a look at preferred payment types and overall shopper activity. This will give you all the information you need to create a profitable eCommerce website in Sweden, or to refine your existing site to get the most of it.
Online Shopping Statistics by Country
Before we will be looking into the specifics of online shopping in Sweden, let’s go into some of the stats. According to Statista research, China stands at the top of the list with $740 million. The US is a relatively close second at $560 billion. Sweden is significantly lower on the scale, with nearly $12 billion spent on eCommerce purchases per year projected for 2019.
Besides, this annual revenue for eCommerce shopping in Sweden is growing at a rate of 6.3% per year.
By 2023, this is projected to amount to over $15 billion for online purchases alone. When breaking this down by the user, we look at the ARPU, or average revenue per user. This presently stands at $1355.70 per year for Swedish buyers. The fashion industry is strongest for online purchases. Below you can see the number of dollars spent on the most popular goods in Sweden.

Economic Trends
To make the most out of your Scandinavian online store, you’ll need to understand the economic trends of the Scandinavian countries and Sweden in particular. In addition to having some of the strongest economies in Europe, the distinction between physical sales and online purchases is rapidly disappearing. Nordic shoppers are more receptive than most to expansion in the online market.
In 2016, online purchases in the Nordic countries amounted to nearly 22 billion Euros.
- Finland accounted for the lowest proportion of these sales. 49% of the population, about 1.9 million people, purchased on average of 135 Euros per person per month.
- Norway has the highest per capita sales on average at 173 Euros per month. 65% of the population reported that they had purchased online, about 2.4 million people.
- Denmark has 2.6 million people made online purchases in 2016. It is about 63% of the population and at an average of 162 Euros per person per month?
- Sweden is the 14th wealthiest country in the world with currently $51,209 dollar per capita. Estimates for 2021 increase the numbers to 7.2 million online shoppers, an additional 900,000 in two years alone.
 One important trend to take note of is the fact that the percentage of purchases from abroad has dropped. The most popular nations to buy from are Germany, the Netherlands, Denmark, Norway, and China. As of 2012, 40% of eCommerce purchases were made from countries abroad. By 2016, this had dropped to 25%, even though overall revenues from online purchases had risen steadily over the period. This suggests that Swedish eCommerce is trending in favor of local sites.
The Most Popular Product Categories
It’s important to remember that the Swedish online market is steadily becoming stronger. One of the best questions to ask when planning your Swedish eCommerce site is, “what is famous in Sweden for shopping?” Online purchases in Sweden and internationally are weighed most heavily towards fashion. Swedish online clothing stores will account for $2.6 billion in 2019.
Purchases are divided equally amongst men and women. The most popular product categories for online purchases are divided by age group. The younger age groups will tend to buy health and beauty products and clothing. The older age groups primarily buy books. Those in the middle age groups will tend to purchase products intended for children.

 Preferred Payment Types
As of 2016, the preferred method of payment for Swedish online shoppers was by invoice. Nearly 37% of sales were made via invoice, reflecting the appeal of this method in traditional purchasing. It’s projected that in 2019, 49% of online payments will be made with credit and debit cards. 20% of sales were made through PayPal and other online wallets. However, the landscape changed significantly over the next few years.
Current projections show that this percentage will increase over the coming years as well. This means that purely online methods of payment will increase significantly, while invoices are almost a thing of the past. Another surprising shift over the next few years is an increasing reliance upon payment on delivery. While this is expected to rise only to 1% by 2021, it suggests an increased trust in online purchase methods.
Useful for you:
Customers’ Activity and Preferences
One of the benefits of establishing a Swedish online store is that the Swedes tend to be confident in online purchases. Nearly three-quarters of the population are reported to have purchased online at least once during the year, and 30% have ordered online at least once a month.
As indicated above, fashion purchases are the most popular.
Useful for you:
As of 2017, the greatest bulk of online Swedish purchases – 57% – were done through a laptop. Smartphone and desktop purchases were close behind, with 34% of purchases made with desktops and 37% made via smartphone. Tablets were the devices least used, accounting for only 19% of online purchases. The use of smartphones and laptops for online purchasing has been steadily increasing since 2016.
Features of the Successful Swedish Online Store
One of the most important features for successful Swedish eCommerce sites is delivery.
Delivery satisfaction is key to retain customers and encourage future purchases. Clear delivery information is absolutely essential. 89% of Swedish online shoppers require this before they feel confident making a purchase.
Choices in delivery are important as well. About 67% of shoppers report that they prefer to have a choice in the delivery day, and 55% would feel more comfortable purchasing if they have the opportunity to choose same day delivery. Furthermore, 60% of online shoppers prefer home delivery over other options. Finally, it’s crucial to use delivery services that your customers know and have confidence in.
Other ways to increase customer trust include free refunds, and, if possible, free delivery.
Tracking options are expected by 78% of Swedish shoppers, so this is a key feature for the successful Swedish online store.
Useful for you:
The second key is payment options.
This goes for all online stores, but it’s a major selling point. If a customer goes through the process of browsing and selection, only to find that they can’t purchase with their preferred method, you’ll have abandoned carts, and worse, they’ll not be likely to visit your site again. So, make sure to include payment by card, e-invoice, e-wallet, and bank transfer.
Another important feature is to provide a means for your customers to contact you.
Old methods include feedback and testimonials. However, one of the best methods is to use live chats. Customers will be able to reach you live and at the moment, and this increases customer trust.
Payment Processing Tips for the Online Clothing Store
The world is changing due to improvement in technology, which has dramatically eased payment processing for the online clothing store. Many customers can now buy online from clothing store websites — the reason why your online store is critical. It’s the only point where customers relinquish their credit card to pay for the acquired goods and services.
It’s prudent to be entirely in charge of your check out page to increase sales for your business. Other than popularly known PayPal, there are several online payment methods. Unlike long ago when you used to shop manually, with a single click nowadays, you can buy the attire you want online without having to travel. Here are general payment processing recommendations for any eCommerce online clothing store.
General Recommendations for eCommerce Online Clothing Store
Online clothing store should be able to take its clients through significant processes such as payment options, hosting, marketing tools, reports, and designs. It would help if you began by examining how much you can sell.
Customization is another vital tool for eCommerce online clothing store. To increase the level of customization offer attractive templates because clients prefer the great user experience along with trendy design. The site speed is also usable for UX.
Useful for you:
And last, but not least are various payment gateways available for your customers’ convenience. To implement them successfully, you need to follow certain security standards, compatibility with the platform you use and payment methods related to the country where you sell goods. Below you can read about the most essential payment methods for the next years and security standards to make your customers’ payments safe and prove the trustworthiness of your business.
eCommerce Security Features in 2019
Any online clothing store requires reliable security features. Without trusted security features cause payment fraud and hacking of your online clothing store. Apart from financial fraud, you risk exposing your customers’ data. However, using credible security features will build trust within your clients and reduce any payment fraud. Here are examples of trusted security features that you can use to improve the confidence of customers on your website.
SSL Certificate
SSL certificate is an important security feature which protects sensitive information from being transferred via online clothing stores. It also boosts the ranking of your online clothing store due to Google added SSL certificates. It is hard to determine the original SSL certificate, but there are online comparison tools which can help you get the right certificate for your need.
Business Validation SSL enables your visitors to check Company’s business name and verification of your business number. While Extended Validation SSL certificate is equipped with Green Bar, which has your verified company name, the right SSL certificate doesn’t and has never failed. Get the right SSL certificate and avoid fake ones.
Two-Factor Authentication
Weak passwords predispose your online clothing store to the highest risk of hacking. In Two-Factor authentication, you combine two of the three possible factors. These potential factors are; what the user knows (e.g., a PIN code), what the user has (e.g., a credit card) and what the user is (e.g., a fingerprint). So online clothing store uses the Two-Factor authentication (what the user has and what the user knows) to transact online.
The second authentication occurs when you link your account with your mobile phone or USB fob. When you combine it with password and username, you get a robust layer of security. Two-Factor authentication makes it hard for scammers to access your online clothing store.
Firewall Usage
Firewall is used to protect the traffic that goes throughout your network. Firewall thoroughly examines the traffic to block any unauthorized access to online data from the organization. Other than protection Firewall has additional features which can neutralize any scammer’s ability to use stolen personal details to hack your online clothing store.
A firewall has the power to sieve internet transmissions to allow the only traffic that belongs to the organization. Firewall is an outstanding security feature which has significantly evolved to curb hacking.
Privacy and Cookie Policy
Any online clothing store requires privacy because of the sensitivity of the data at hand. So the rights and privacy of any site must be respected. If any personal information is collected, it’s only supposed to be used for the intended purpose. You should never be afraid to enter personal data in a reliable site.
Cookies are data files placed on your device when you are surfing. They cannot affect your device because they are standard across all sites. The purpose of the cookies is to provide information to the bearer of the website making it efficient. They also help monitor the number of people who visit your site. With cookies, you define traffic flow which helps make vital decisions in your business.
Various Payment Methods
Online clothing stores were the fastest to embrace new online methods of payment. With the latest technology, money is transferred automatically to your client’s bank account without delay unlike long ago. Here are various payment features used by different clothing stores.
Useful for you:
Payment with Checks
The process begins when you provide checking account details such as routing numbers to a business. With the particulars, the attendant pulls out funds from your bank account electronically. You can provide these details by typing it online. You can also write your check on paper, scan it and have it converted into electronic checks. Some companies have check reading machines to process your payment.
You proceed to upload the check information for processing. The amount reflects later in the service provider’s account within a day or two. You use the same procedure for a mailed check. Remember to give back the check.
Online Clothing Stores That Accept Checks Online
The following online stores allow you to pay directly from your account electronically. You begin by placing your order online and then send a paper check to the company for processing. Once all the requirement have been approved, your attire is shipped to you. Here is a list of the clothing stores that accept online checks in Africa, Asia, Middle East, Europe, North and South America.
The process is simple. A customer can perform paying with a check by simply choosing PayPal payment.

He or she will be redirected to their user account. PayPal allows the user to link check account to the PayPal. This is the most widespread payment gateway for the online store. However, a customer can pay by scanning the check and sending it directly via email or use another payment gateway to link check account to it.
How to Facilitate PayPal Payment
Shopping online is quick and hustle free. It’s secure from unauthorized users. Almost everybody can send and receive money through a PayPal account if you have an email account.
Step 1. Once you open the site type in the search pack to get a list of matching attires from the retailers.
Step 2. After selecting the attire, add it to the card and choose PayPal as your payment mode. To confirm whether the site is secure ensure that it starts with “https.”
Step 3. Finally, log in your account and choose to pay from your credit card or bank account linked to your PayPal account. When you complete the process, you receive a receipt in your email that you can print for the future reference.
Online Clothing Stores That Accept PayPal
Here are examples of the online clothing store that you can link, order and pay via PayPal.
- Adidas
- Calvin Klein
- Victoria’s Secrets
Payment with Credit Card
There are lots of online clothing stores which accept credit card. The process of credit card payment for the customer looks the following: If you are shopping for sneakers, for instance, key in “add cart” in your shopping cart. Select the type of attire you want to buy and click check out button; after that review your cart to rest assured that you added the right shape, size, and colors of your choice.

To complete the payment enter your shipping address.

Enter the credit card information; security code, number and the date of expiry.

To finalize the purchase process enter the billing address for your credit card. The transaction can’t go through unless you enter the correct billing address. As you can see, the payment process should be simple and smooth. That will lead the customer to place the order and stay satisfied with the store.
Now, most of the stores have a debit/credit card payment option. Also, check payment and PayPal payment are the most common payment methods for any kind of online store.
WEB4PRO’s Key Results of 2018
First of all, we want to thank all our clients and site visitors for their activity and support over the past year. We strive every day to provide value and assistance in growing your brands online.
The motivation behind our goals did not change when December changed to January. We still aim to provide high-quality and efficient technical solutions for our clients’ business growth.
Below, you can read about the key results of our work together in 2018.
WEB4PRO Brand Growth
Last year, we took several important steps to establish our brand and share its values. One of these steps was creating a better user experience on our website. We simplified navigation and added more useful information to several pages, making it easier for visitors to find what they need.
We believe that a website is a tool that shrinks distances between continents, countries, cities, and people. Websites get people the help they need and give them access to the products and services that make them happier and make their businesses more successful. Websites can improve someone’s life or even save millions of lives. High-quality sites are a means for sustainable brands to communicate their values and help make the world a better place. We consider your business to be among these positive brands, and we are happy to be helping you achieve your goals.
They say that if you want to change the world, you should start with yourself first. We took that advice to heart and started by improving our website.

Website UX Improvements
Adding additional sections—such as How to, Privacy and Cookie Policies (GDPR Compliance), Playbook, Dedicated team—has made it easier for users to find all the insights and solutions they need. Our main goal was to provide a comfortable user experience for people browsing our site. Please feel free to send us feedback if you find features that you think need improvement. There’s nothing more valuable to us than your fair opinion.
New Useful Articles
Expert content is our priority. On our site, you can find 96 articles, technical guides, and tips for keeping your business the best it can be. Our blog provides quick solutions to issues and tasks that business owners and developers commonly face.
The more awesome websites appear on the market, the more brands there are sharing their values and supporting social-responsibility programs across the world. As a result, there are more opportunities for people to access the goods and services they need to live their lives to the fullest. We want to be a part of this movement. The first contribution we can make is what we have been dedicated to since 2013: we can help create advanced and smart solutions for responsible brands. Beyond that, we share our knowledge with others by posting useful content.
The quality of content on a site is one of the key factors that determine whether or not it appears at the top of Google search results. Here are some articles and complete guides that are ranked at the TOP of Google search results:
- OpenCart vs Magento: What to Choose in 2018 (Updated)
- Magento 2: How to Add a Custom Attribute to The Customer’s Address
- Best Magento Instagram Free Extension for Your Store
- Guide on How to Save Related Models in Yii2
- SAP Hybris vs Magento 2 for B2B: Let’s Compare the Titans
- Ubercart vs Drupal Commerce
- How to Clear Magento Cache from Command Line
- How to Write a Request for Proposal to Get a Clear Quote?
GDPR Compliance
Our company is GDPR compliant. Guaranteeing security for our clients, partners, and employees are of the utmost importance to us. We want to give the people we work with peace of mind.
We have taken various measures to ensure data protection at our company:
- We added the necessary security features to our site
- We reviewed and updated our Privacy Policy
- We informed all employees and clients about the GDPR
If you’d like to explore the main provisions of the law, we wrote an article you can read about it.
When the GDPR came into force in spring 2018, we prepared all the documentation we needed and made security changes to ensure that we were compliant. You can check the full documentation in our Privacy Policy section.
Contribution to the Magento® Community
We researched how to boost our skills and improve work processes to provide you with the best solutions possible.
As emphasized above, security is a priority for our company, as well as our clients’ companies. Data protection is a vital need for website users. Magento takes care of all security tasks, and that’s why we can confidently choose and recommend this platform. It allows businesses to expand, and it gives them the flexibility to modify or improve their websites in the future. Contributing to the Magento community is one of the steps we take to provide value to businesses and software engineers. This is how we did it.

The Magento Marketplace
In 2018, a few of our extensions for Magento Stores made it into the Magento Marketplace. This was possible thanks to our clients’ feedback and our software engineers’ hard work. If you need an extension for Magento 1.x, check the Marketplace or find ours in Our Products. Our extensions are free to use, and they all include comprehensive user guides.
Technical Solutions
Our blog includes more than 20 technical case studies, detailing problems solved by our software engineers. Thanks to the collaboration of our clients and team, we are growing as professionals and providing more value and expert solutions. If you need help, please feel free to use these solutions, share them with your colleagues, or consult our team. Our shared goal is co-creation, and we want to engineer powerful and effective products for eCommerce.
Magento Community Insider Status
This year ended with WEB4PRO establishing official associate relations with Magento Company. Now we are an official Magento Community Insider, as part of the Community Insider Program. You can find us in the Community Insider Directory.
Meet Magento UK 2018
In October 2018, our team traveled to the UK to attend one of the biggest Meet Magento conferences. By learning from technology and market experts, we gained a lot of new information and met some great people. Now all of us are inspired to help more brands that create useful products and services for the world. We are committed to projects that drive this kind of progress. As always, our team is at your service and ready to tackle the most challenging tasks. Your mission is always possible.
Competency Provement
Our goal is to connect brands with their clients by helping them share values and making their goods accessible around the globe. That’s why our team is dedicated to contributing to the development of the eCommerce system.

 Sharing Experiences
We wrote an article called How to Choose the Best E-Commerce Platforms for the Clutch.co blog, which helps business owners choose the best eCommerce platform for their businesses. This article compares the five most popular platforms for small and mid-sized businesses, as well as five other platforms for enterprise needs. The information in our article helps owners of eCommerce businesses make informed decisions about different platforms based on costs, features, and flexibility.
Our CEO, Marat Mingazov, gave an interview on Magento Development Trends in Ukraine for Cloudways to share his experience in eCommerce, Magento development, and business in Ukraine. As a company, we stand for transparency and business agility, and we were thrilled to have the chance to tell the world more about ourselves.
Clutch.co Acknowledgement
Reliable sources are acknowledging our expertise. Clutch is a great research & review platform that shares fair reviews and knowledge in each professional field. This year we were included in Clutch’s list of the Top 500 B2B Service Providers in Ukraine and Poland in 2018, and we held the 27th position among 625 Magento Agencies. This is all thanks to our clients’ honest reviews.
There’s always another year on the horizon, and we’ve started 2019 by setting some new goals. One of our goals is creating a strong eCommerce community where people can learn, network, and grow their businesses.
We should mention one final source of inspiration for us. There’s something—and someone—driving us to move forward and work hard every day. Something is a desire to create and care about useful projects. The someone is YOU! You are our hero. A hero is a person who has a good idea and a strong belief in its success. Heroes are people who struggle for a better future and work hard for progress in the world, people whose work is powered by a positive mission and bold values. Heroes support those who need help. They care about the world and the environment. But sometimes they need support—a team of followers who can multiply their strengths and help them create amazing things. We are ready to be your team.
Let’s co-create!
If you’d like to see more, take a look at our presentation on SlideShare:

How to Add Product in Magento and Edit It from the Admin Panel
Products or services are the items you sell in your store. For a user, it is important to get not only clear but detailed information about the product, shipping, and delivery. This guide will help you to get through the questions on how to work with products from the admin and programmatically.
How to Add New Product in Magento Admin Panel
Step 1: Log-in to the Magento Admin panel.

Step 2: Click “Catalog” option on the top menu. A drop-down list will appear.

Step 3: Click “Products” in the drop-down list. A new window will be displayed.

Step 4: Click the “Add Product” button on the top-right of the page, also, you can immediately choose a type for your product. You will be directed to a new window.

Step 5: Here, you will notice a header with “New Product” with 2 buttons “Add attribute,” “Save,” and many fields, you must fill them. Initially the field “Attribute Type” shows “Default” in the text box next to it. And “Product Type” field shows “Simple Product.”
Step 7: Now to modify the options in the text box of the field “Product Type,” click the “drop-down arrow” at the end of the text box to view the multiple drop-down options like Simple Product, Grouped Product, Configurable Product, Virtual Product, Bundle Product, and Downloadable Product. Select the one you wish to add. For instance, say “Simple Product” selected.
Step 8: Click “Continue” button. A new product page with default attribute opens up.

You’ll find a header “General” below which different fields like Name, Description, Short Description, SKU, Weight, Set Product as New From Date, Set Product as New To Date, Status, URL Key, Visibility, Country of Manufacture, In Feed, and Featured Product with their empty fields will appear.
Step 10: Now, enter the name of the product in the “Name” field. Say XYZ.

Step 11: Click “Save and Continue Edit” button on the top-right corner of the page to save the details automatically. Now continue entering the details in rest of the fields.
Step 12: Select the option “Enabled” in the drop-down of the field “Status.”
Step 13: Ensure whether the visibility field is filled in with “Visibility, Search” option.

Step 14: Now click the “Search Engine Optimization” on the LHS of the panel.

Step 15: Add Meta titles, descriptions, and keywords in the necessary fields respectively.
Step 16: Click “Images And Videos ” option on the LHS of the panel to add images for the product.

Step 17: Click “Advanced Inventory” option on the LHS of the panel. A new page will be opened.

Step 18: Modify the “Qty” with the number of products in-stock, say 200 or 300 and set the “Availability” option at the bottom of the page as “in-stock.”

Step 20: Click “Prices” on the LHS of the main panel; set the necessary price-related details in the relevant fields.

Step 21: Use this section in Magento to add configurable product. The new page contains advanced settings.

That’s all you are done with adding a product to your website! All it takes just a few minutes to add a compelling product to the Magento store to raise the performance of your business. Next, we will consider how to do the same task programmatically.
How to Add Product to Cart in Magento Programmatically?
Add Product to cart by observing an event checkout_cart_product_add_after
<your_magento_directory>/app/code/JD/Floatcart/Observer/AddproductToCart.php :

namespace JD\Floatcart\Observer;


class AddproductToCart implements \Magento\Framework\Event\ObserverInterface{

   protected $_productRepository;
   protected $_cart;
   protected $formKey;

   public function __construct(\Magento\Catalog\Model\ProductRepository $productRepository, \Magento\Checkout\Model\Cart $cart, \Magento\Framework\Data\Form\FormKey $formKey)
   {
       $this->_productRepository = $productRepository;
       $this->_cart = $cart;
       $this->formKey = $formKey;
   }
   public function execute(\Magento\Framework\Event\Observer $observer)
   {
       $item = $observer->getEvent()->getData('quote_item');
       $product = $observer->getEvent()->getData('product');
       $item = ($item->getParentItem() ? $item->getParentItem() : $item);

       //id product that you want add to cart
       $product_id=1023;

       if($product->getId() != $product_id){
           $params = array(
               'product' => $product_id,
               'qty' => $product->getQty()
           );
           $_product = $this->_productRepository->getById($product_id);
           $this->_cart->addProduct($_product,$params);
           $this->_cart->save();
       }

   }

}
To <your_magento_directory>/app/code/JD/Floatcart/etc/events.xml you need add code as this:
<event name="checkout_cart_product_add_after">
   <observer name="addproduct_tocart" instance="JD\Floatcart\Observer\AddproductToCart"/>
</event>
That’s how in Magento you add item to cart programmatically. Next useful skill is to learn how to create products from the admin.
How to Create Simple Products in Magento 2
Step 1: Choose the Product Type.
- On the Admin sidebar, click Products. Then under Inventory, select Catalog.
- In the upper-right corner on the Add Product menu, select Simple Product.

Step 2: Choose the Product Template (Optional).
To choose the product template, do one of the following:
- In the Search box, enter the name of the template.
- In the list, choose the template that you will use. The form is updated to reflect the template.

Step 3: Complete the Required Fields.
In the Product Details section do the following:
- Enter the Product Name.
- You can either use the default SKU that is based on the product name or enter another.
- Enter the product Price.
Because the product is not yet ready to publish, set the Product Online switch to the “Off” position.
Click Save, and continue with the next step. You can save the product settings after complete all the required fields complete.
Step 4: Complete the Remaining Product Details.
Set Tax Class to one of the following:
- None
- Taxable Goods
If you’re ready to add a product image, do one of the following:
- Drag an image from your desktop, and drop it on the camera tile in the Images and Videos.
- In the Images box, click the camera tile, and navigate to the image file on your computer.
Then, select the image, and click Open. A placeholder appears until a product image is uploaded.
Enter the Quantity of the product that is currently in stock.
Enter the product Weight.
To assign the product to a Category, do one of the following:
- Start typing to find a match. Then, choose the Category.
- Click Show List to see the category tree. Then, drill down and click on each category that you want to assign to the product.
- Click New Category. Enter the Category Name and choose the Parent Category to determine its position in the menu structure. Then, click Create Category.

Enter the product Description directly into the text box, and format as needed. Then, click Submit. You can also use the WYSIWYG Editor, for additional control.

Step 5: Publish the Product.
If you are ready to publish the product in the catalog, set the Product Online switch to the “On” position. When complete, on the Save menu, select Save & Close.
Step 6: View the Product in Your Store.
In the upper-right corner on the Admin menu, select Customer View

Things to remember:
- Simple products can be included in a configurable, bundle, and grouped product types.
- A simple product can have custom options with a variety of input controls, which makes it possible to sell many product variations from a single SKU.
How to Import Products in Magento 1.x from CSV?
Step 1: Go to the Magento administrator area and choose System -> Import/Export -> Dataflow – Profiles -> Import All Products. Select the required settings in Profile Wizard tab:

Step 2: Then choose the Upload File tab and browse for the .csv file on your computer.
Save changes:

Step 3: Once you have uploaded it, click Import All Products, then Run Profile, select the .csv file you have just uploaded from the drop-down menu and click Run Profile in Popup:

Step 4: When the import is completed, you will get an export success message.
What Is Magento Bundle Product?
This type of Magento products is somewhat a set of configurable products. It is a stable complex product designed to let customers build the end product required. The configuration options are virtually unlimited.
How to Create Bundle Product in Magento 2?
Step 1: Select the Product Type by selecting Catalog -> Products.
 Products” width=”1895″ height=”785″>
Next, create Bundle Product.

Step 2. Choose the attribute set as a template.

Fill out the required fields:
- Product Name;
- SKU (default or change the Dynamic SKU to No so that you can assign a unique SKU);
- Dynamic Price (to do the same as with SKU, change Dynamic Price to No, and write your price);
- Choose the Store view where the product should appear;
- Tap Save and continue.
You can also assign a Tax class. If the bundle has Fixed price you have 2 options:
- None
- Taxable Goods
The Quantity is not available as the value is different for each bundled product.
Dynamic weight can be changed according to the options provided for the customer.
- If you choose the Dynamic option, the price may change according to the selected options.
- If you choose Fixed weight, you need to set the weight.
Next, you want to create a Category.
Tap New Category or choose the one that it is already set.

Write the Category Name and assign it to the Parent Category, next click on Create Category.

Add product description and a picture.
Step 3. Set the Bundle Items.
In the Bundle Items section, choose how to Ship Bundle Items: Separately or Together.
Then click on the Add option.

There you will find the Input Type and choose the one among Drop-down, Radio buttons, Checkbox, or Multiple Select.
Then click Add Products to Option and mark all the products that you want to include.
Type the Quantity of each product on the Default Quantity section.
Then press Save.
Step 7. Check the results by clicking to the Admin Icon and choose the Customer View.


Here is the result of the product bundle feature in Magento 2. It is very useful for the stores that want to sell different products together in one kit. In general, we wanted to help you learn how to create products and manage them from the admin panel. If you want to know how to do it, follow the extended instruction below.
Necessary Features of eCommerce Clothing Online Store
Online clothing stores are steadily gaining popularity. As of 2018, eCommerce revenue from fashion in the U.S. alone rose to over $100 billion per year. This increase in annual revenue shows no signs of slowing down. Put simply; to enter the field, it’s important to know the must-have features for a successful online clothing store.
In this article, we’ll cover all the essential elements for your eCommerce clothing site. We’ll look at how to bring in more visitors, boost conversions, and strengthen your reputation as a trustworthy brand.
Easily Understood Navigation
One feature of a successful site is simple navigation. Visitors need to be able to see what you have to offer and move easily from interest to purchase. You’ll want the site clean and without unnecessary complications.
Ensure that choices are simple with easily recognizable call-to-action buttons. Top categories should be visible on the homepage, alongside featured products and sales. Special offers and catalogs or newsletters should be offered here as well.

Once a visitor clicks on a category, they should be directed to a page that features a listing of all the top selling items in that range. It’s best to offer search features and filters for style and pricing so a customer can find what they want without spending hours searching. Below you can see the examples from Cox&Cox and Abercrombie&Fitch that simplified users’ browsing experience:


Finally, make sure to provide a listing at the bottom of each page (i.e., footer), including contact information, the sitemap, and links to other details that may interest the visitors.

Overall, keep things streamlined and make it simple for visitors to find any products or information they’d like to see.
High-Resolution Photo and Video
The first thing that a customer sees when they visit your site is the image. And this is more important with fashion than other sites. It’s the look that sells that clothing. So it’s essential to use the highest resolution photos you can include on the site without slowing down the load time. Look at Tiger of Sweden example.
The tactfully-placed video is a great opportunity to show off a line and pique interest in a product or range. Long story short, a photo will sell your products better than a thousand words of content, and it leaves the site looking cleaner and more appealing.
Social Media Integration
Social media is a great way to showcase your products. It generates more traffic and brings in new leads. But, for a fashion store, not all social media channels are created equal. Since the visual appeal of fashion products is the most powerful selling point, a photo-driven social media like Instagram is the ideal channel for reaching new customers.
One great example of Instagram used expertly for an online fashion store is Topshop. In their Instagram account, each product and post is labeled with the hashtag: #TOPSHOPSTYLE. So, anyone who wants to check out new products or share hot looks can enter this hashtag and instantly find their entire range of apparel.

A well-crafted Instagram account and hashtag can multiply your profits in a fraction of the time needed for other methods. Plus, social media accounts won’t cost a dime. You can’t beat free advertising based on your customers’ preferences.
Useful for you:
Related Items
One way to expand interest is to provide an option to view other similar products. For example, a visitor likes the look of a certain garment, but it isn’t exactly what they’re after. They could spend valuable time scouring the site for something else that fits their needs. But, if you feature a slideshow of related items beneath a given product, they can find something similar after just a few minutes of looking.
Sometimes, it’s the whole outfit that sells the look. ASOS has made use of this with their “Buy the Look” feature and “You Might Also Like” where in the first case, you can see what was used in the outfit and if you want something similar, the second option will display other related products.

Instead of just buying the featured top, a visitor can add the rest of the outfit to their cart. The customers are made happy and you get a chance to boost sales.
Advanced Payment Options
The key to getting conversions is to make it easy for customers to buy. And, different customers will prefer different forms of payment. So, be sure your website is set up so that customers can pay the way they want. PayPal is a given these days. It’s become one of the easiest online payment methods.
But you don’t want to stop there. Authorize.Net and Google Checkout are also great options to include. But let’s explore some other important payment options.
Accepting Checks Online
With so much going digital, it could be easy to forget about the importance of checks. But some shoppers are more traditional. Checks have been around for years, and they’re a trusted form of payment. If a customer is just beginning to move into online shopping, they often feel more comfortable when they can use a tried and true way to pay. Set up your site so that it can accept checks, and you keep contact with an important portion of your demographic.
PayPal allows your customers to link their checking account to it, so they can pay online by check. There is one simple step: you need to select PayPal at checkout, log in, then pay.

Split Payment
Sometimes we are interested in a product but just can’t swing the full price with just one payment method. There are two choices. They can either wait until they can manage the purchase with a single payment method or you let them split the payment. Most purchases, particularly in the world of fashion, are impulse buys, at least somewhat. With waiting time, the interest might fade. With split payments, a buyer can pay part with one payment method and part with another.
For example, they may pay $50 with PayPal and $50 with a credit card to fund a full $100 purchase. This lets them buy right now, meaning less lost sales and higher conversions. At Abercrombie, you can use two cards and select the amount of money, you want to pay from one and another debit or credit card.

Credit Card Payment
Even with all the digital payment methods included, you’ll still want to make sure your site can process credit and debit cards. These payment options are just as trustworthy as checks, if not more so. Plus, they are nearly universal. Credit or debit cards are standard for anyone with a bank account. Make sure to include processing for these methods to keep from losing sales.
Detailed Shipping Information
Shipping is a major consideration for eCommerce sites. High shipping rates or low delivery times mean fewer conversions. If your customer has questions about how much shipping will cost or how long it will take, this is another barrier to the purchase.
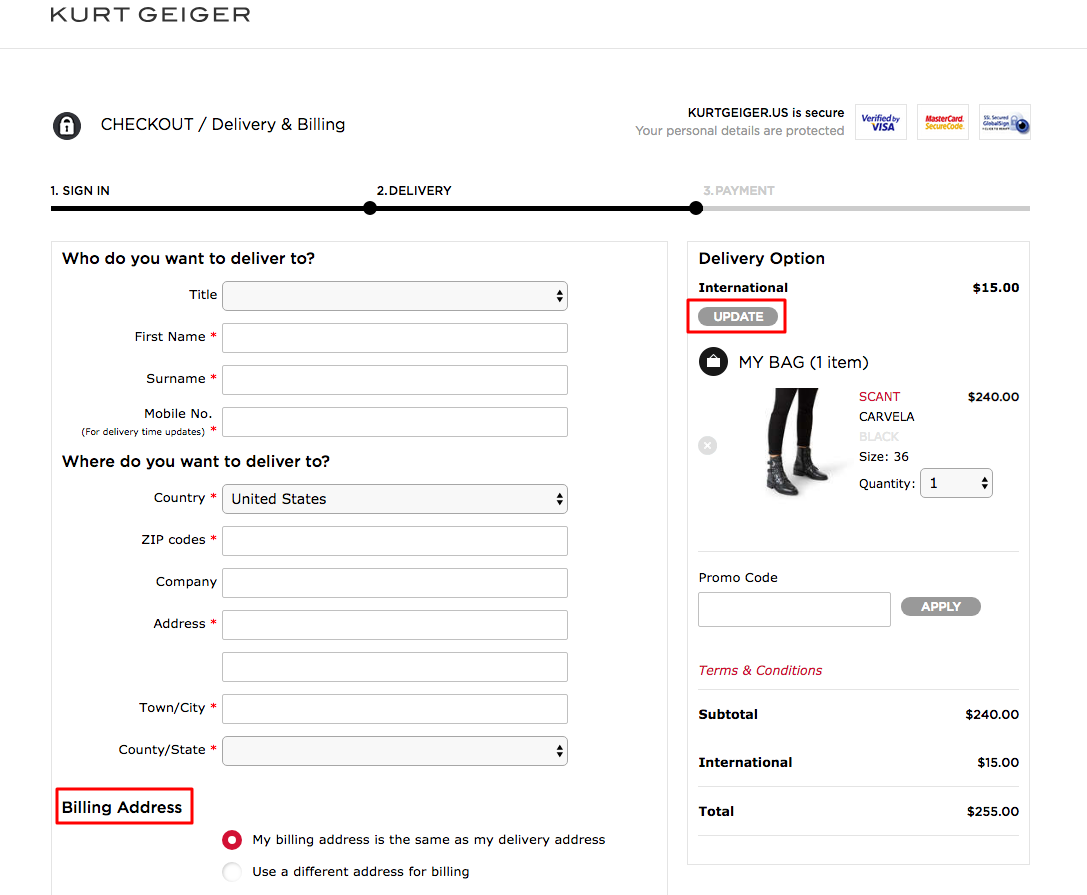
Clearly mark shipping options, timing, and prices on the checkout page. Detailed information leads to more conversions and less abandoned carts. It is important to make clear and simple checkout with all the kinds of shipping available, so that customer can choose the one at his/her preference. Also, don’t forget to include the “Edit” shipping method button and options for filling out the billing information. Simplicity and clean design is the key to success.
Fast Shipping
Fast delivery is essential. A fashion site is banking on impulse purchases. Visitors buy because they want they want the product now. If you make express shipping standard, customers will be excited to receive their product quickly. Another great option is to provide expedited shipping on purchases over a certain amount. This encourages customers to buy a few more things just to make sure they can receive their order without delay. Plus, it boosts the perceived value, showing your consumers that you appreciate their business.
Free Shipping
Free shipping is one of the best tips for a fashion eCommerce site. When you advertise no shipping costs, visitors will be more comfortable adding to their order, knowing that they won’t be facing hidden costs. In such a competitive industry, the better value you provide, the more likely you are to generate more traffic and increase customer loyalty.
How to Work with Magento Admin Panel: Login and Setup
If you just started working with Magento, you might be wondering about how to change the basic functionality of your store right from the admin panel. We’ve got you covered with our simple, but comprehensive guide. Below you can check the most common changes in Magento functionality that you can do manually with simple steps or programmatically by using our guide.
How to Login to Magento Admin Panel
Firstly, you need to login to your Magento store’s admin.
Step 1: Go to your Magento website. Add /admin or custom Magento admin URL to the URL and reload the page.
Step 2: Type in your username and password that you set up during the installation process.

Step 3: You are now logged into your Magento 2 Admin Panel.

Sometimes you need to change your data and reset the password for your Magento admin. We’ll show you 2 ways how to do it for both Magento 1.x and Magento 2.x versions.
How to Change Magento Admin Password
For Magento 1.x
You need to modify the Magento administrator password directly in the database using phpMyAdmin or the MySql client. You can execute the following MySQL query:
UPDATE `admin_user` SET `password` = md5('NEW_PASSWORD') WHERE `username` = 'ADMIN_USERNAME';admin_user – this is a database table from the Magento database;
NEW_PASSWORD – the desired password which you want to be set;
‘ADMIN_USERNAME’ – your Magento administrative username.
For Magento 2.x
The first option is to change the Magento administrator password through e-mail. To do this, follow these steps:
- Go to the Magento Admin Panel Login.


- Click Forgot your password.
- Type the e-mail address associated with the account.


- Click Retrieve Password. Magento sends a message to the e-mail address associated with the administrator account.
- In the message, click the link to reset the administrator password.
To edit an existing administrator, you can use the same command as for creating a new administrator in CLI:
bin/magento admin:user:create [--<parameter_name>=<value>, ...]
Required parameters:
–admin-firstname – Magento administrator user’s first name.
–admin-lastname – Magento administrator user’s last name.
–admin-email – Magento administrator user’s e-mail address.
–admin-user – Magento administrator username.
–admin-password – Magento administrator user password.
If you’re editing an administrator, only the first name, last name, and password can be modified.
Example:
bin/magento admin:user:create –admin-user=admin –admin-password=123123w –[email protected] –admin-firstname=Magento –admin-lastname=User
How to Reset Magento 2 Password via Phpmyadmin
You can reset admin password via phpmyadmin
Step 1. Login to phpmyadmin

Step 2. Choose your database
Step.3 Select ‘SQL’ tab and rub query:

UPDATE admin_user SET `password` = CONCAT(SHA2('xxxxxxxxYOUR_NEW_PASSWORD', 256), ':xxxxxxxx:1') WHERE `username` = 'YOUR_ADMIN_USERNAME';Where admin_user – database table (it can contain table prefix – check it):
YOUR_NEW_PASSWORD – your new password
YOUR_ADMIN_USERNAME – your admin login name
Xxxxxxxx – character sequence is a cryptographic salt. It is saved in an app\etc\env.php file:
<?php
return array (
...
'crypt' =>
array (
'key' => '525701df74e6cba74d5e9a1bb3d935ad', //cryptographic salt
)
You can also resolve the admin access issue by creating new admin user using Magento console command:
php bin/magento admin:user:create
How to Increase the Time Logged into Magento 2
You can increase Magento 2 session lifetime by changing a value in:
Stores > Settings > Configuration > Advanced > Admin > Security > Admin Session Lifetime (seconds)

Or you can change value ‘admin/security/session_lifetime’ in table core_config_datait in your store Database.
Next, we’ll describe how to create CMS page and change different parts of your Magento store right from the Admin panel.
How to Create CMS Page in Magento
Step 1: Login to your Magento admin panel and navigate to the Content menu.

Step 2: Select the Pages menu.

Step 3: Click on the Add New Page button.

Step 4: Specify your new Page Title and select the desired Store View.

Step 5: Go to the Content tab and write the page content.
Step 6: In the Design tab choose the Layout for this new page.

Step 7: Note your page URL key.

Step 8: Save your changes by clicking on the Save Page button.

How to Add Favicon in Magento 2
Step 1: Go to Content -> Design -> Configuration.

Step 2: Choose Configuration.

Step 3: Click on the HTML Head settings tab.

How to Change Logo in Magento 2
Magento 2 store logo can be changed by admin in Content -> Configuration -> Edit link, that is related to store -> Header -> Logo Image
 Content > Configuration” width=”1897″ height=”764″>
Step 2: In the Configuration page, you will see a list of default website, then click on Edit under Action column.

When the page is opened, scroll down to the Transaction Emails section and click on it.

Step 3: In Transactional Emails, you will see a list of logo settings for your email including:

Logo Image – different types of file are allowed (jpg, jpeg, png). Here you can upload your desired email logo with a high-resolution display.
How to Change Header in Magento 2
A header can be changed by adding new blocks to the container ‘header.container
’ or its child containers or removing blocks and containers from them. Example for adding block
<?xml version="1.0"?>
<page xmlns:xsi="http://www.w3.org/2001/XMLSchema-instance" xsi:noNamespaceSchemaLocation="urn:magento:framework:View/Layout/etc/page_configuration.xsd">
   <body>
       <referenceContainer name="header.container">
           <block class="Web4pro\Test\Block\Template" name="header.custom.block" template="Web4pro_Test::header_custom.phtml" before="-"/>
             </referenceContainer>
   </body>
</page>
How to Change Footer in Magento 2
Footer can be changed by adding new blocks to the container ‘footer’ or removing blocks from it. Example for adding block:
<?xml version="1.0"?>
<page xmlns:xsi="http://www.w3.org/2001/XMLSchema-instance" xsi:noNamespaceSchemaLocation="urn:magento:framework:View/Layout/etc/page_configuration.xsd">
   <body>
       <referenceContainer name="footer">
           <block class="Web4pro\Test\Block\Template" name="footer.custom.block" template="Web4pro_Test::footer_custom.phtml" before="-"/>
             </referenceContainer>
   </body>
</page>
Magento Email Templates for Your Email Marketing Campaign
Emails always seem to be a simple thing to create, right? You just need to write a few words, add some link to your site and, send it out. Email services will let you come up with your own email by using their default designs. But, what would you do if you want to improve your emails and make them have some dynamic content that will enable them to remain consistent on other channels?
The answer is to use a template that is specially designed, and this is where the email templates come in. In the world of business, marketing is always an important thing and one of the strategies often used is the sending of customized emails. This can either be from the business to the consumer or from a business to another business entity, commonly known as B2B email marketing.
For that reason, therefore, let us explain more about Magento® email templates.
What is Email Marketing?
From what we’ve talked about above, you can conclude that email marketing is simply the use of emails to promote your business. This is usually done by customizing or personalizing a message and making it available for your potential consumers. This way, you will be increasing the chances of your business being noticed by a large number of people thus increasing the chances of getting more customers too.
Why Do You Need Email Marketing?
Emails always play a huge role in our lives, because they help us to get access to any website or platform and read some specific content.
When it comes to business, email marketing presents an excellent opportunity especially when you are trying to reach your potential consumers regardless of the audience. When you introduce the use of emails as one of your business marketing strategies, you will notice that it improves the visibility and reach of your business, thus giving you the ability to engage with the leads and convert them consistently.
Email marketing can also give you the freedom to customize your messages according to the actions of your customers.
You are able to categorize your target audience and see into it that the messages with the greatest impact reach the right leads in good time. Other advantages of using email marketing include the fact that it is a cost-effective method and is also among the easiest strategies to use when it comes to performance and the results you get.
Do You Need Email Marketing Templates?
An email template is basically an email that has already been written or designed and can be used to send emails for your business to both the potential and retained customers.
When working with an email template, all you need to do is change what is already there with the content of your choice, for instance, the details of your product, the logo of your business and also the signature.
If you use Magento as a platform for your eCommerce store, platform-oriented email templates will give you the following advantages:

Time-Saving
When it comes to promoting your business, it will take you some time to come up with your own design and write the content before you can finalize on it and send it out. Well, this process might take a lot of your time since there is also some testing that needs to be done after editing. But, if you go ahead and use email templates, you perform email preparation faster. This will allow you to think of other ways of improving your business.
Brand Consistency
When you use email templates for your marketing campaigns, people will be able to notice a particular design pattern in your emails. This will make them remember your business each time they see your emails. This helps you in maintaining brand awareness hence the need to always include your websites, channels, and logo in the content.
Enhances Communication
Of course, there will always be some competition when you join the world of business. This is why most people strive to come up with great marketing strategies, one of them being branding and keeping it consistent. This is what the consumers usually depends on regardless of if they are going to respond to the offer or not. They will always look for a trustworthy company. Additionally, you can also add some personal touch to the template you are using when personalizing your messages. This can make the customers understand you better.
Increases Your Revenue
When the communication improves, the relationship between the business and the customers also improves. This increases your chances to acquire more web traffic.
Useful for you:
Common Mistakes in Email Templates
People always make mistakes in almost everything and using email templates is no exception. Below are some common mistakes one can make when using email templates.

Non-Responsiveness
Not everyone will open the emails on the computer, some will use tablets and others will even use their cell phones. This, therefore, means that people should be able to open emails across all the devices regardless of the email template design used. Whether you decide to create an email template from scratch or use something like bootstrap email template, make sure they are able to fit the screens perfectly for easy navigation. Anyway, why waste all that time trying to come up with a new design when you can simply use a responsive email template like bootstrap.
Twisted Logic in Content
Well, you can’t really get your message across when you keep on shifting the logic in your message. Remember to always keep it short and precise. This will give a more clear message then when you start telling a long story and end up confusing everyone.
Too Many Pictures Used
Using too many images in an email will make it quite bulky thus they will take much time to load on various devices. This is why most people usually disable the images option when using their mobile phones.
Unavailability of Unsubscribtion
This is a crucial point to note yet some people still miss it. Without the unsubscribe button, the consumers might go straight ahead and start marking your emails as SPAM. This might affect the reputation you’ve worked so hard to build when it comes to deliverability. Make sure to always include this option in your email template.
No Call-To-Action
Don’t leave your customers hanging. Make sure you clearly indicate why they are receiving your emails. Remember to ensure that you have a call to action statement in your emails. This will also make a lot of people to engage with your business.
No A/B Testing
For you to get more customers, you need to come up with great content that will encourage them to click or open up the messages. The A/B test or email template testing will help to find out which option is the best to use. This way, you are guaranteed to get a good number of clicks.
Useful for you:
Where to Find Great Email Templates
If you’ve already decided that you will be using email templates, you should consider taking a look at the sites below.
ThemeForest
If you are looking to find great creative designs when it comes to templates, consider taking a look at this site. At an affordable price, you can always find nice designs that suit your needs. WEB4PRO has own email templates there, so you can check the portfolio and choose the one for your email marketing campaign.
TemplateMonster
Whether you want WordPress themes or web templates, this place is where you should be looking at. Even from the name itself, you can already tell it is a great place template. They offer nicely designed templates at a competitive price too.
Ivycommerce
This is also among the best places to purchase email templates from. If you are looking to find great Magento email templates, you can start here. They do offer responsive and customizable email templates.
Christmas Marketing Ideas: How to Prepare Your Site This Holiday?
Christmas is the biggest shopping season worldwide. For over a century, companies have been boosting sales by stepping into the festive spirit and offering deals that excite and entice their customers. The holiday is tailor-made for this purpose. We give Christmas gifts to show love to those we care about. This means more purchases and a perfect opportunity to reach interested customers.
On average, Christmas spending is more than all other holidays put together, and it can constitute nearly 20% of annual profits. According to Statista, last year alone, Christmas spending amounted to almost $700 billion. This makes Christmas marketing crucial for a successful year. In this post, we’ll explore Christmas Marketing Ideas and protips for preparing your eCommerce website for the season.
The Essential Features for eCommerce Store This Christmas
This part is the most important for merchants because it is related directly to their store performance. When you get prepared for the holiday sales, you may find your store run slowly while lots of customers browsing and buying products at your store. Below is the list of what can be done to avoid such mistakes:
- Check your store performance and speed. You need to check website speed via Pingdom to make sure that it is running fast and pages’ loading speed is less than 3 seconds; so that customers can interact with your store freely. Also, check whether you have caching configured at the server’s side and on Magento® (or other CMS) side.
- Test the checkout page and shopping cart for speed and performance. You don’t want your website visitors to abandon the cart. Check all the checkout process and the speed of it. It should be fast, and the fields should be understandable for a user to fill them out.
- Create a separate landing page with a counter-timer and Christmas theme. This additional webpage will help you to attract clients during the holiday season and let them learn more about your company and deals.
- Place pop-ups, use promo codes and set up discounts from the admin panel at your store. You can use the full promotion functionality for your Christmas sales campaign and gain both potential and current customers’ attention.
Now let’s move on to the actual Christmas marketing campaign ideas for this year.
Useful for you:
Marketing Campaign Ideas
When setting up any marketing campaign, start by setting goals. The basic goal for any business is to increase profits. To do this, you need to know who to reach and what they’ll want. Then break it down and get more precise. Set clear goals that have a time frame and can be measured. Keep realistic, and focus efforts to support the overall goal within this time frame. Rather saying you want more sales in general, shoot for higher profits over December and November compared to last year.
Next, look into execution. Here’s where the marketing campaign comes into play. You might increase sales by using an influencer or becoming more active on social media. Consider company holiday newsletter ideas to reach more customers and share your great deals and discounts. Plus, since this season has high competition, you’ll want to do something surprising and different.
You can also run mini-campaigns for loads of smaller holidays. Small Business Saturday and Free Shipping Day are also great for deals and discounts. If you sell globally, consider holidays in other selling regions. Niche holidays mean niche customers and increased reach. Plus, by acknowledging other holidays, you keep from alienating those who don’t celebrate Christmas.
Finally, make your campaign unique by adding value in addition to the discounts or deals. You could extend warranties, offer free returns and postage, and provide complimentary stocking fillers or coupons that customers can use year-round. Off the sales for a couple of weeks after Christmas to clear old inventory, make space for the new product range, and reach even more customers.
Useful for you:
Pay Attention to Christmas and Holiday Keywords
Anyone with an eCommerce site understands the importance of keywords. Plus, if you’ve been at this for a while, the top performing terms will be pretty clear. You can boost traffic by adding seasonal terms to the focus keywords. Anything that has Christmas in it is going to peak for a couple of months, so optimize your site for these terms.
Look into Google’s Keyword Planner. It will show how different searches relate to each product and service. It also offers other related terms. This lets you optimize the website around even more buyer intent keywords. Use these terms for advertisement too, orienting Adwords and Pay-Per-Click campaigns around them. Also, consider what problems the product solves, framing ads and communication around how the product improves the life of the buyer.
Match Promotions with Your Content & Social Strategy
When brainstorming marketing promotion ideas, fit to the company. Your brand and business are unique. You have put work into developing a USP and reaching a specific demographic. Tailor the promotions to offer what your demographic wants.
Regarding content, consider what searches your target audience will make as Christmas rolls in and create blog posts around these topics. Christmas is about sharing, so these blogs are an opportunity to share tips and details with your clients. These blogs can be featured on social media as well as the site. Remember to keep them natural and fit them with the company theme.
Play with some Christmas meanings and tradition and create an attractive advertisement as, for example, UPS did. Their hashtag – #WishesDelivered, gained popularity on Twitter, as well as their short, but meaningful promo that pays attention to their great Christmas delivery services.

Update Your Website to Cater to the Holiday Mood
An effective Christmas marketing campaign also means tweaking the site to fit the mood and theme of the season. Use Christmas imagery on the landing page and make the promotions visible and visually appealing. Put your discounts and deals right up front and easy to read, showing visitors how they can save money with great holiday deals. Use the same imagery on social media channels.

You can also feature gift guides and bundled packages on your landing page. Gift guides are simple to create and perform.

They both generate interest and provide suggestions to spark new ideas. Include them on social media sites as well and you’ll boost conversions dramatically.
Run a Holiday-Focused Email Campaign
Email campaigns are awesome for reaching consumers, especially on the holidays. For holiday eCommerce email ideas, consider using Christmas themes emails to expand brand recognition, showcase unique products, and offer holiday deals. Add links that your customers can use to reach the holiday gift guides, and you make conversions even easier.
Personalize the message personalized to speak directly to your customers. A nice touch is to put your own signature on the email. A Christmas banner is another great addition. The personal touch lets customers know they’re valued and boosts engagement.
Here are some platforms to find holiday email templates:
ThemeForest
ThemeForest offers more than 44,000 WordPress themes and Website templates. They are inexpensive, beginning from as low as $2. Plus, they are fit for every type of service or product and every holiday season. It’s a massive library of top-quality themes. ThemeForest is connected with the Envato Market, a community of designers offering thousands of digital assets for all design needs.
WEB4PRO offers many great Christmas email templates to refine your email marketing campaign. Check here all the templates and find the right one for you. Below are the examples of our Christmas email templates:


TemplateMonster
TemplateMonster is another place to find themes for WordPress, Shopify, Magento, and many other eCommerce platforms. It is a user-friendly site with more than 25,000 themes. More than 2 million sites use TemplateMonster themes. They offer a 100% satisfaction policy and 14-day money back guarantee. Plus they offer 24/7 support and a personal consultant to help you find the template that fits your needs perfectly. The themes are a bit pricier than ThemeForest, but they are high-quality digital solutions.
Showcase Your Holiday Offerings on Facebook
Social media is tailor-made for reaching customers and generating interest. Facebook is ideal to get consumers engaging with content. Put great blogs on the business Facebook site and remember to use creative holiday taglines. That way, users are kept in the loop on the best deals. Use photos and seasonal imagery to fit the festive theme, but try not to overdo it and keep the theme compatible with the brand. Remember to focus on unique, emotionally engaging messages.
Create Funny Holiday Video
Videos are a great way to optimize your website and increase rankings. A holiday video reaches more users and helps them to find deals they’ll want. To keep it catchy and unique, consider a touch of comedy in the video. This keeps things light and boosts customer interest. If you do it right, customers will remember it, visiting your site again later and spend longer browsing.
Christmas Sales Ideas
The options for are great Christmas sales are endless. Consider giving percentage discounts, bundled products, or flash sales. VIP discounts for valued consumers, coupon packages that come with seasonal purchases, the options go on. Emphasize creativity and match the deals to your demographic and niche. Here are some ways to boost holiday conversions:
Use Scarcity as a Strategy
Scarcity and urgency are ideal for getting a buyer to bridge the gap between interest and conversion. Use limited time offerings like a two-day or hour-long sale. Advertise the deal ahead of time, and make sure customers know that it’ll end when stock runs out. “Limited time offer! While supplies last!” This may not be a novel approach, but it works as well now as it did when it was first conceived.
Remember that bestsellers will move fast during the season, and stock up on the hottest products before the deal begins. Include an inventory counter on your site, so buyers can watch the inventory dwindle. This encourages customers to buy before the stock runs out. Plus, you can reinforce this by giving a clear cutoff date for the last purchase.
Offer a Gift with Purchase
Free is a word that garners more attention from the customer than any other. Give something away, and you give customers a bargain, adding value, even if it’s only perceived value. When you bundle items, you can offer less popular products for free along with more popular ones. Even if you only add a bit of value, that’s massive in sales terms. You could also offer free coupons that can be redeemed all year long. This takes advantage of the buying frenzy to boost traffic throughout the year.
A great tactic for eCommerce sales is to offer free shipping. If a customer has to pay shipping costs, they are sure to stop and reconsider the purchase. Especially when so many of your competitors are making sure that customers can get their products shipped to them free of cost. This is especially important within the last few days before Christmas. If you offer free worldwide or overnight shipping so the gift arrives before the holiday, customers often overlook a bit of a price hike in the product itself.